How to publish NuGet Packages to MyGet from Azure DevOps Pipelines
MyGet Package Management works great with the continuous integration tools your team already uses, such as Azure DevOps Pipelines.
In this guide, we will cover how to publish a NuGet build artifact package from an Azure DevOps Pipeline build to a private feed in MyGet. From there, you can safely share your package with your team, make it available for future builds via MyGet’s NuGet API endpoints, and track package statistics like download count, version promotion history, and more.
You can configure your Azure DevOps Pipeline to publish packages to MyGet by adding NuGet build tasks to the pipeline configuration with the Azure DevOps UI or by adding a YAML file with the correct parameters to the root of your project’s source code repo.
Note: If you are building an app with .NET Core or .NET standard packages, you should use a .NET Core task instead of the NuGet task shown in the example below. The .NET Core task has full support for all package scenarios currently supported by dotnet, including restore, pack, and nuget push.
NuGet build tasks
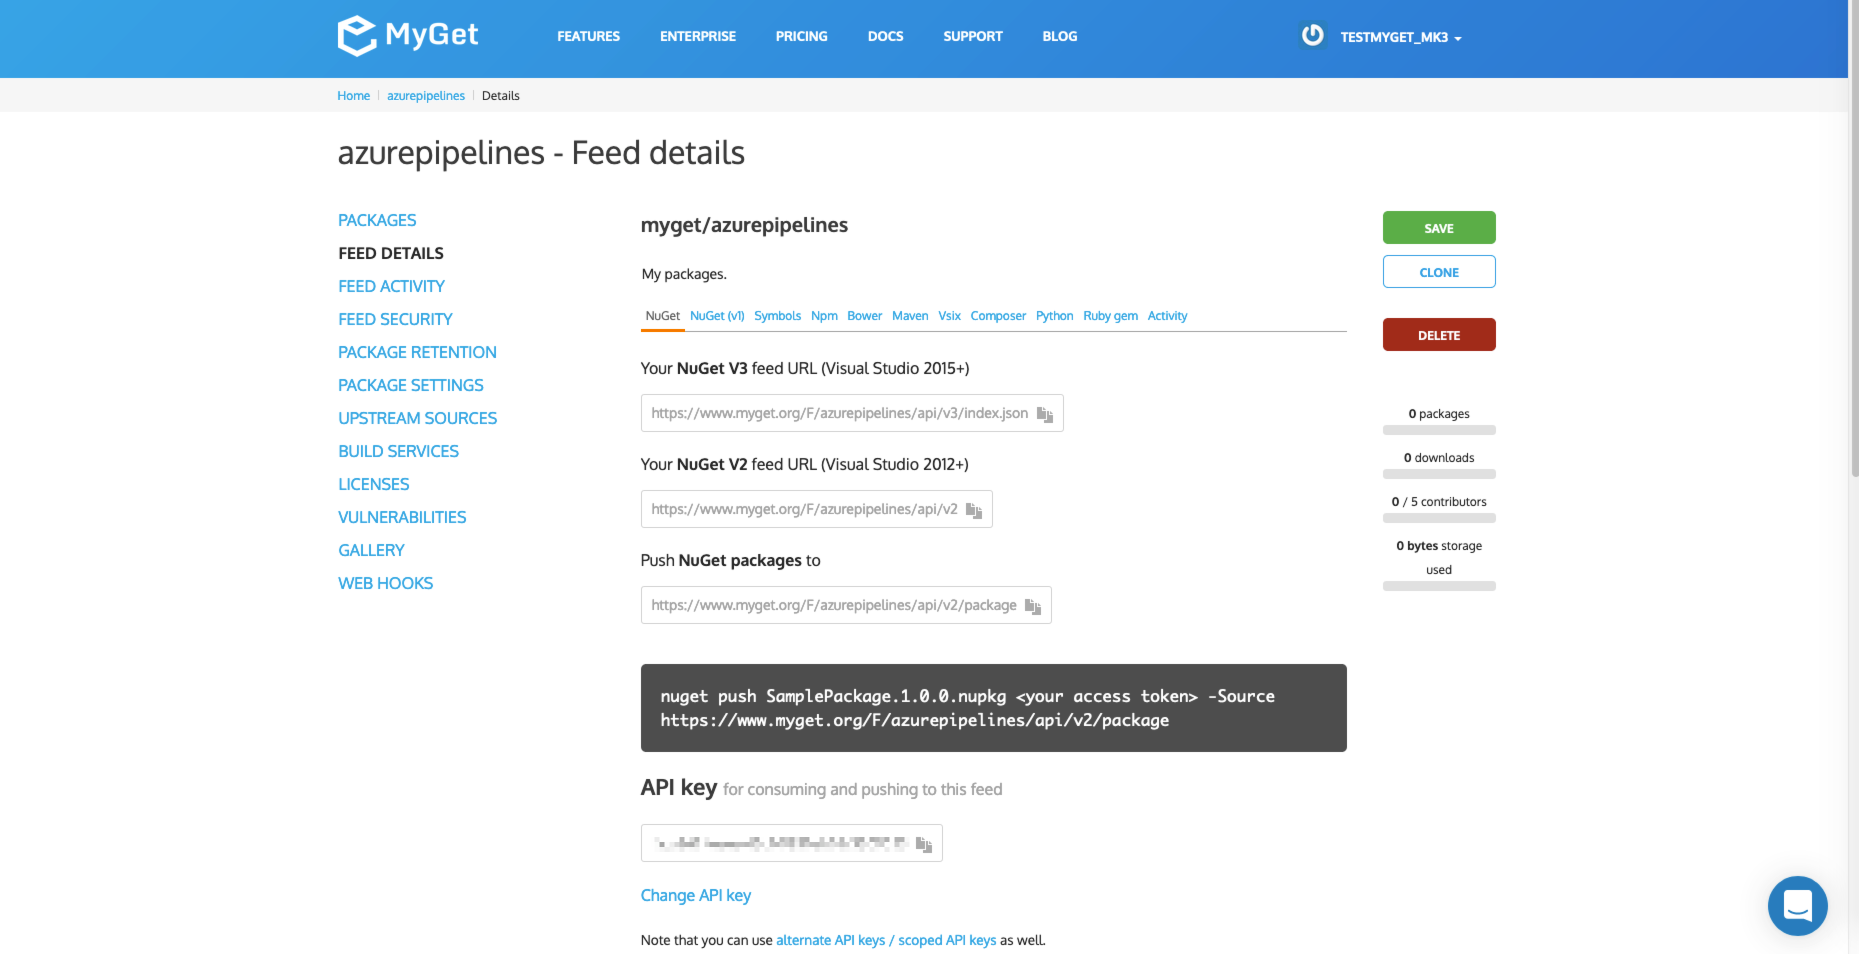
Step 1. Create a new feed in MyGet that you would like to serve as your target package repository on MyGet. Navigate to the “Feed Details” menu from the left, and identify the values unique to your feed under “Push NuGet Packages to” and “API key.”
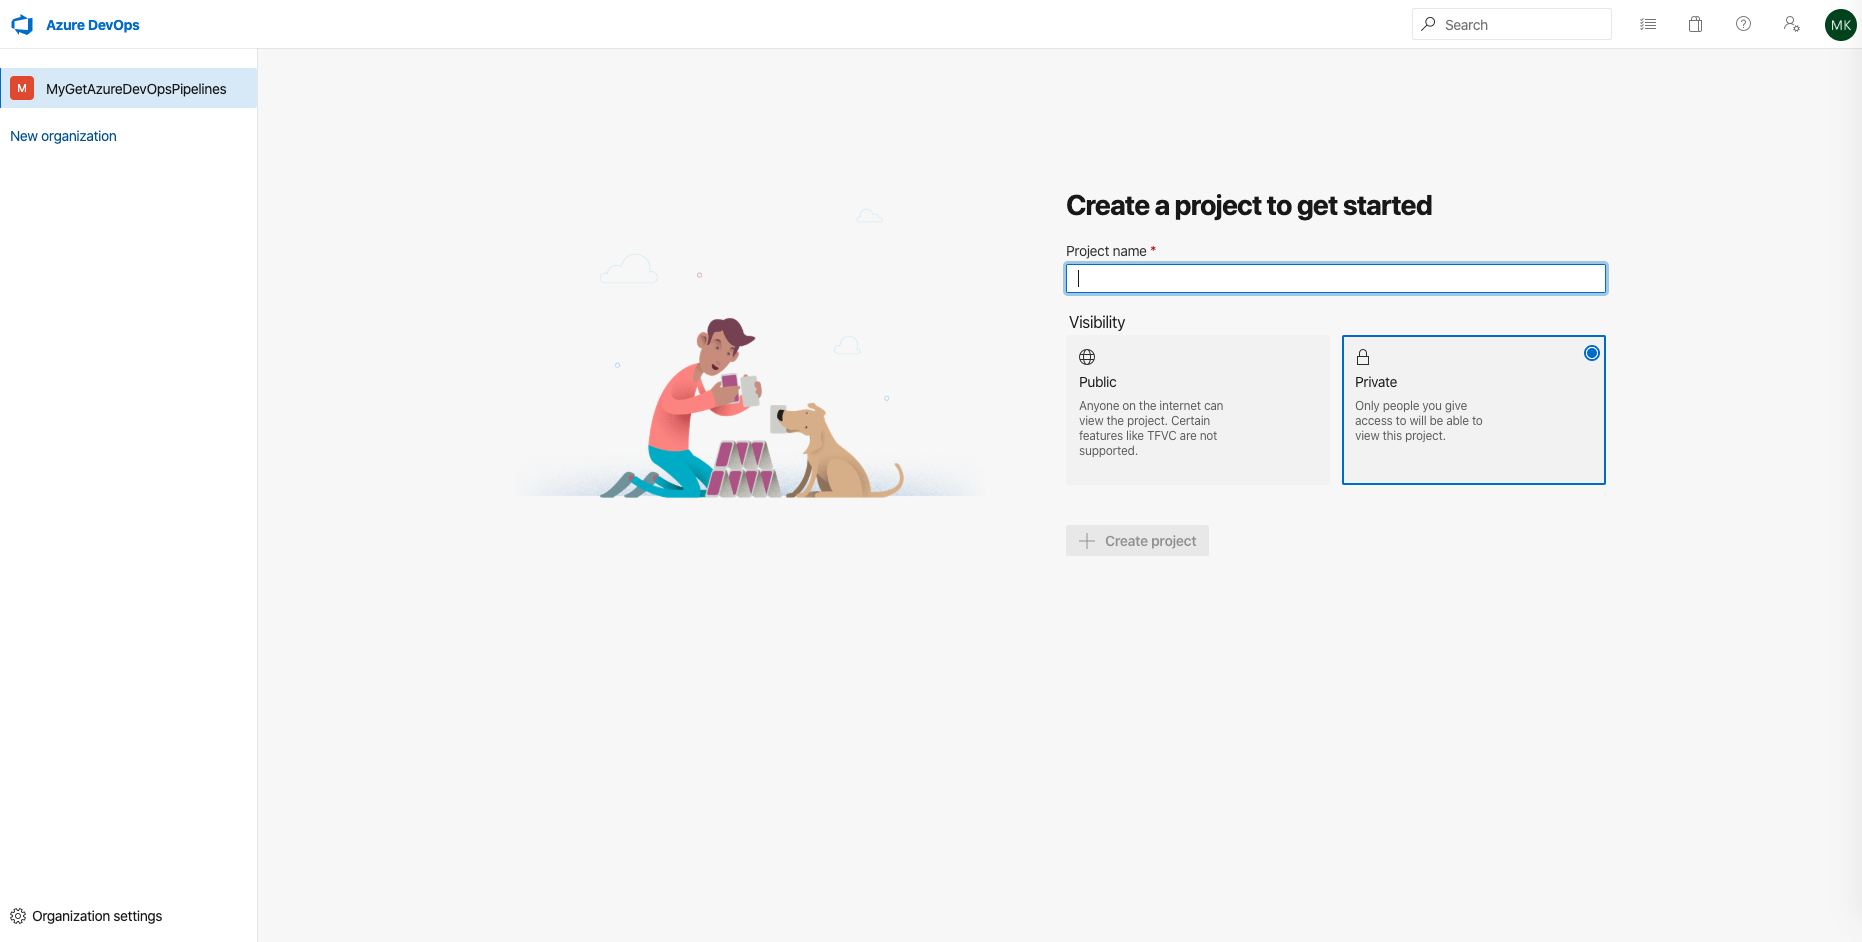
Step 2. In a new tab or window, open Azure DevOps Pipelines and navigate to the project you would like to integrate with MyGet, or optionally create a new project.
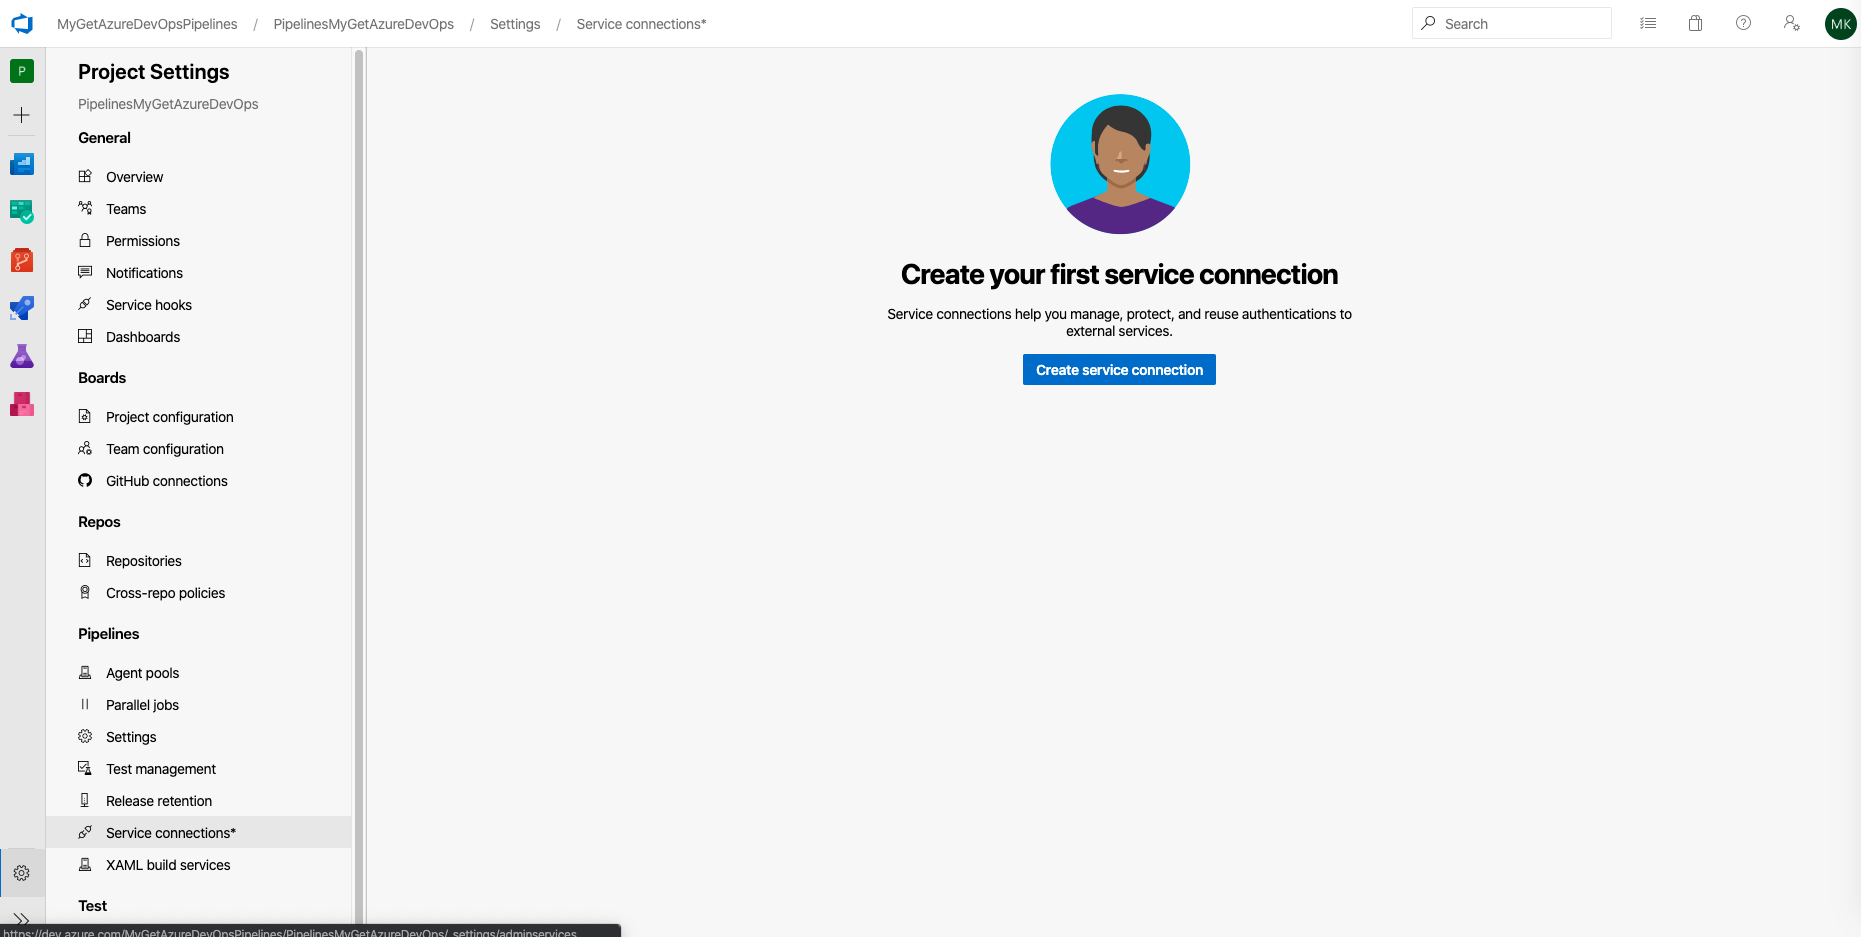
Step 3. From the Project Settings menu, select “Service connections” and click “Create Service Connection. For this example, we will be setting up our Azure DevOps pipeline to push NuGet artifacts to MyGet, so select “NuGet” from the service connection options, and click “Next.”
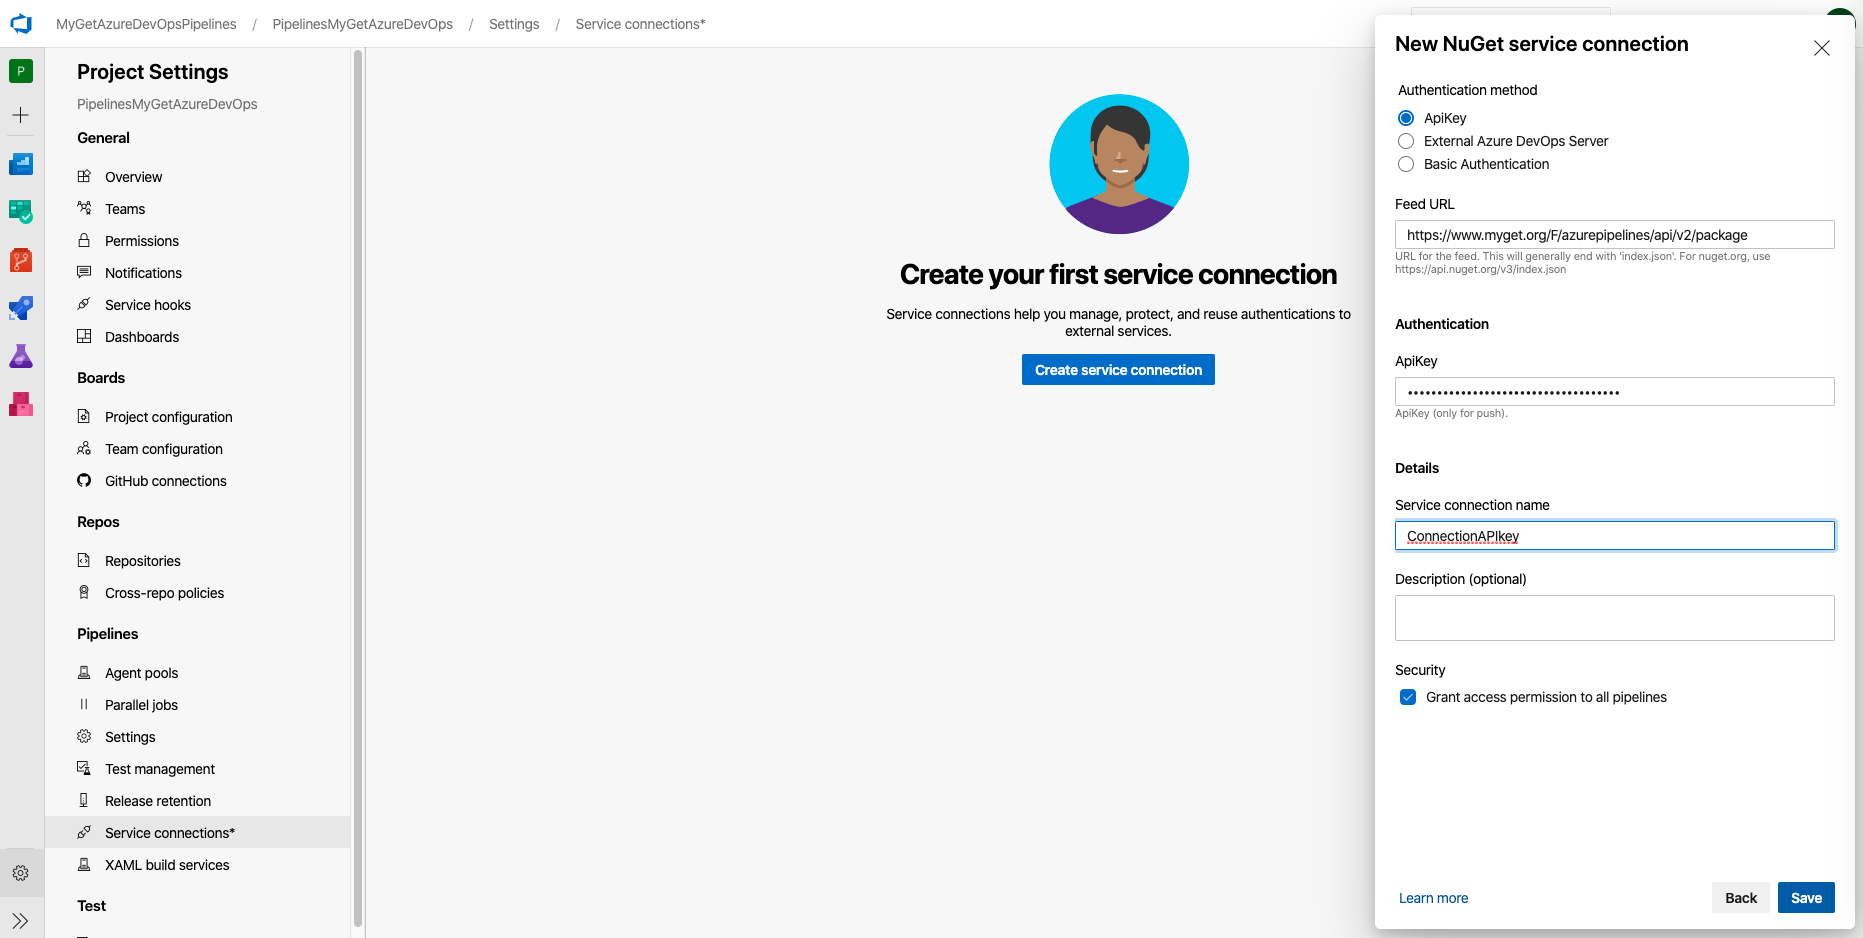
Step 4. Set up a new NuGet service connection using the ApiKey authentication method. Copy the Feed URL and API Key from the Feed Details tab of your target MyGet feed and paste into the New NuGet service connection dialogue. Give the service connection a meaningful name; you will use this name to refer your MyGet API settings when setting up NuGet build tasks later.
Step 5. Now that you have set up your MyGet service connection, navigate to your project’s Pipelines tool and select the pipeline whose build artifacts you would like to push to MyGet, or optionally create a new pipeline.
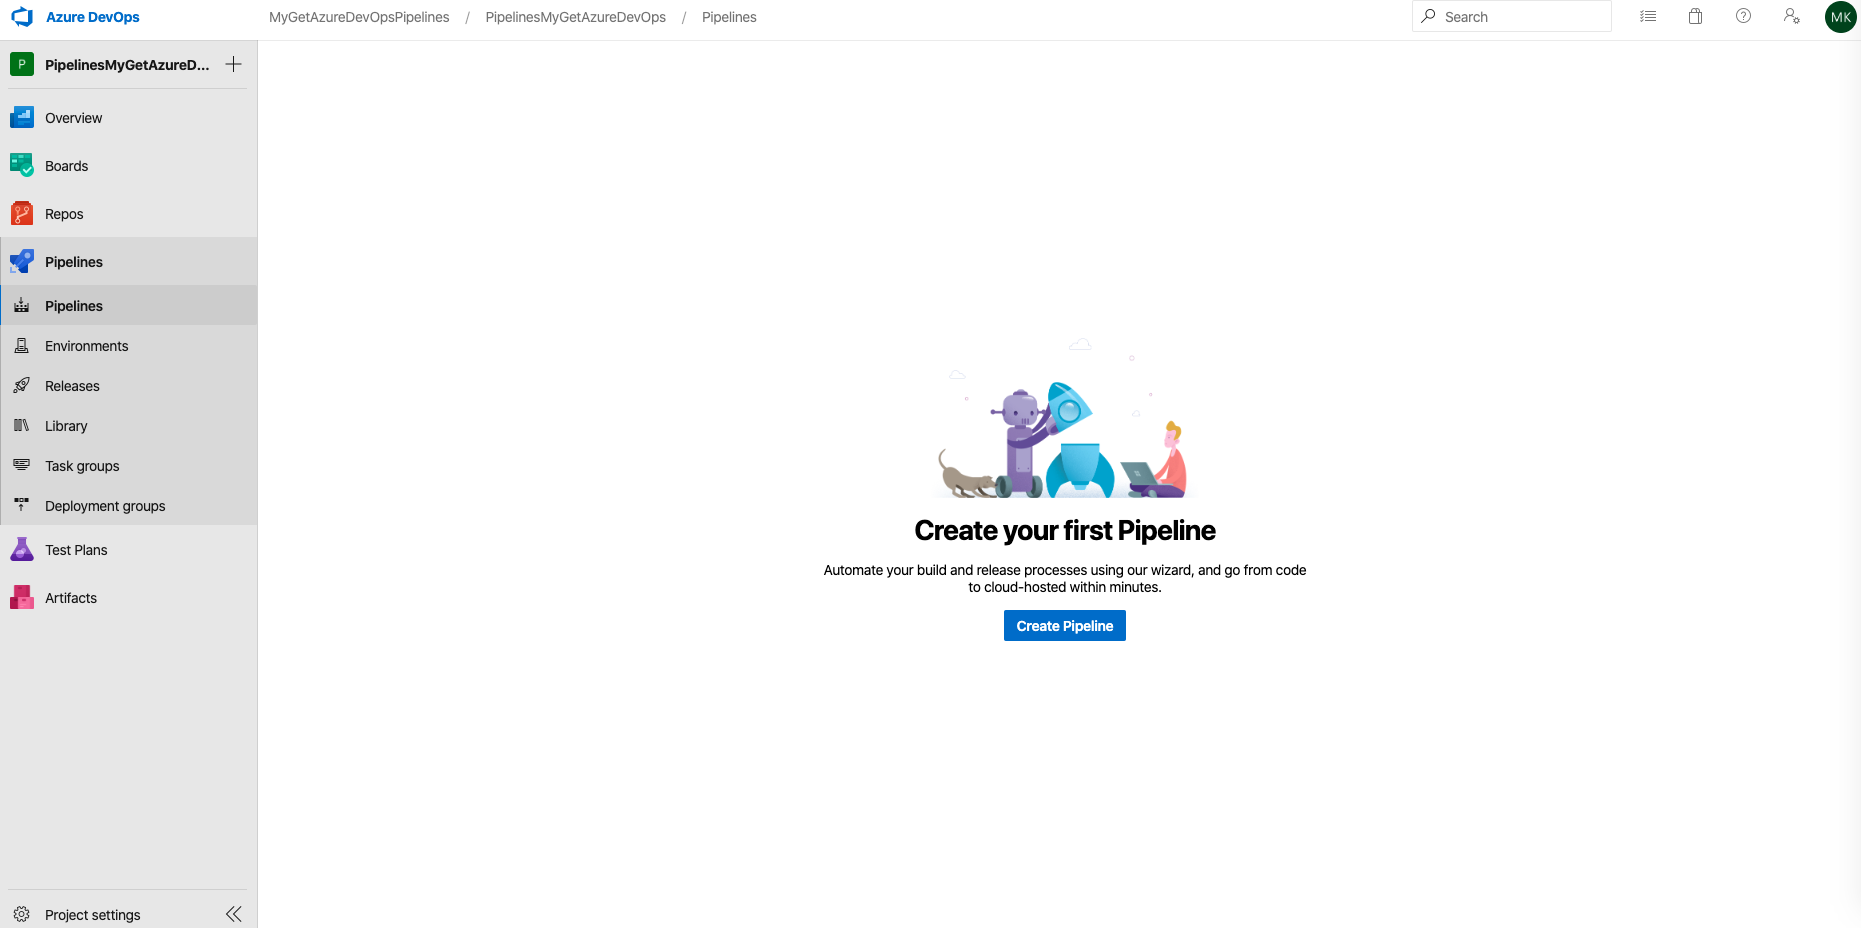
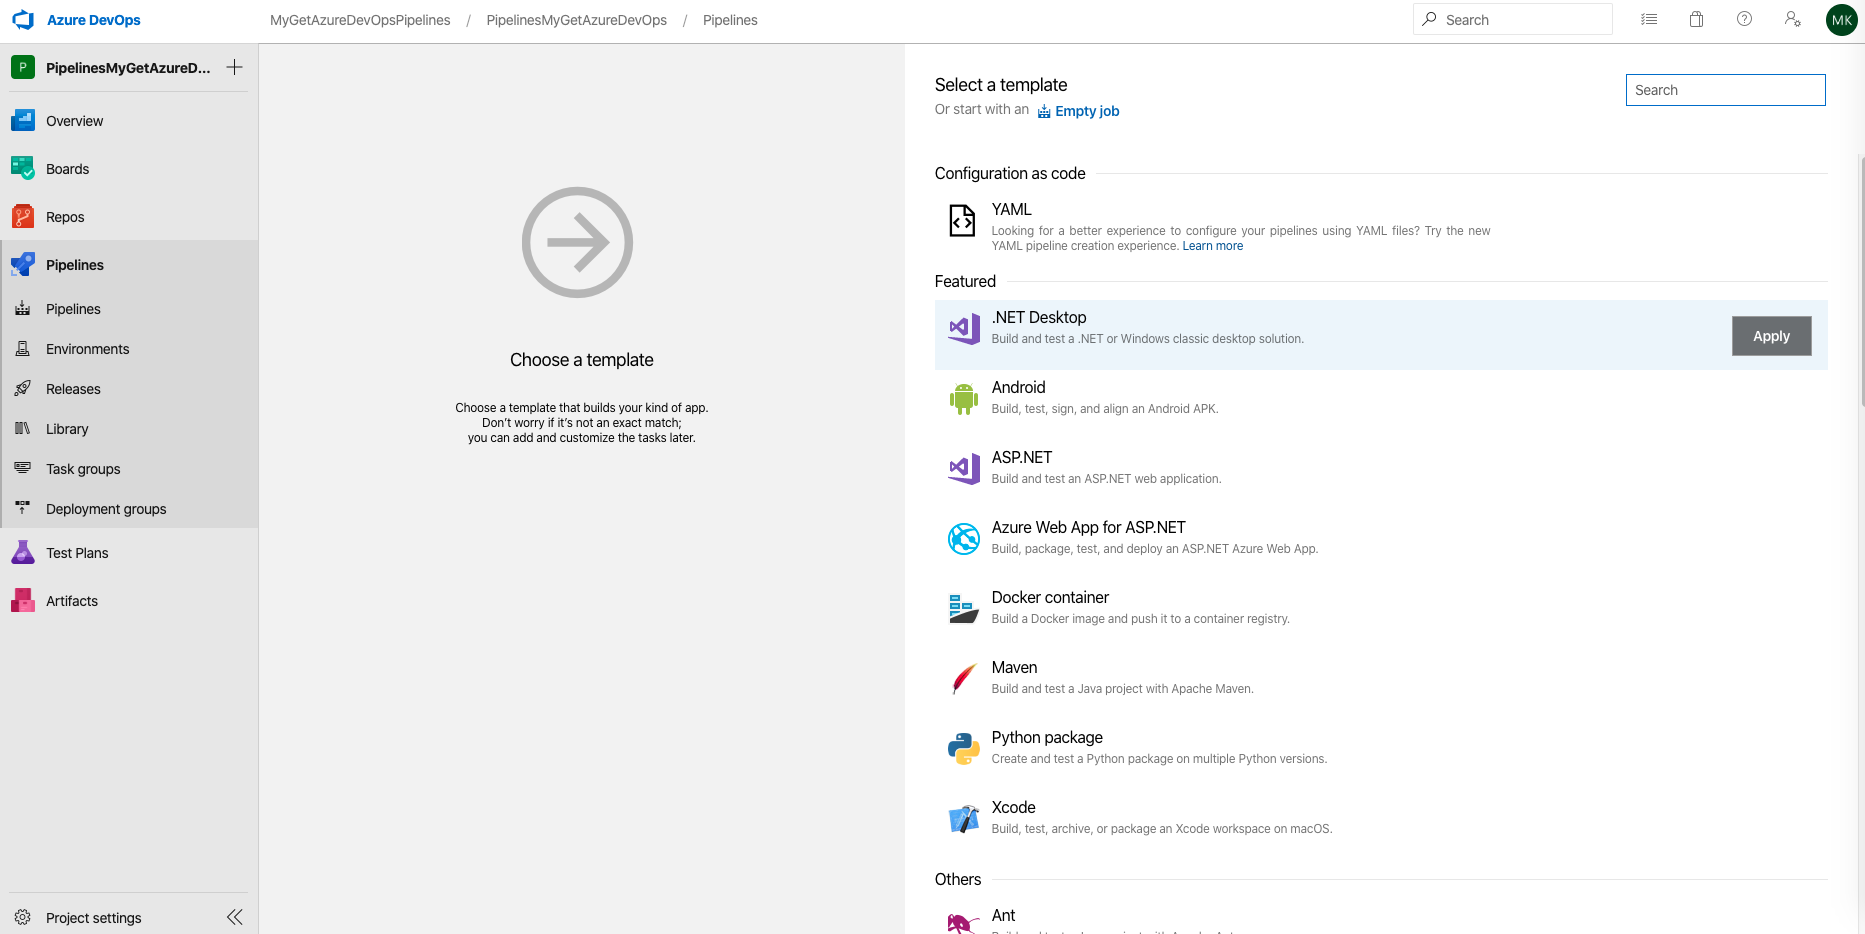
If creating a new pipeline, you can create a blank pipeline or select a pipeline template based on the type of application you are building. In this example, we will create a pipeline based on the .NET Desktop template.
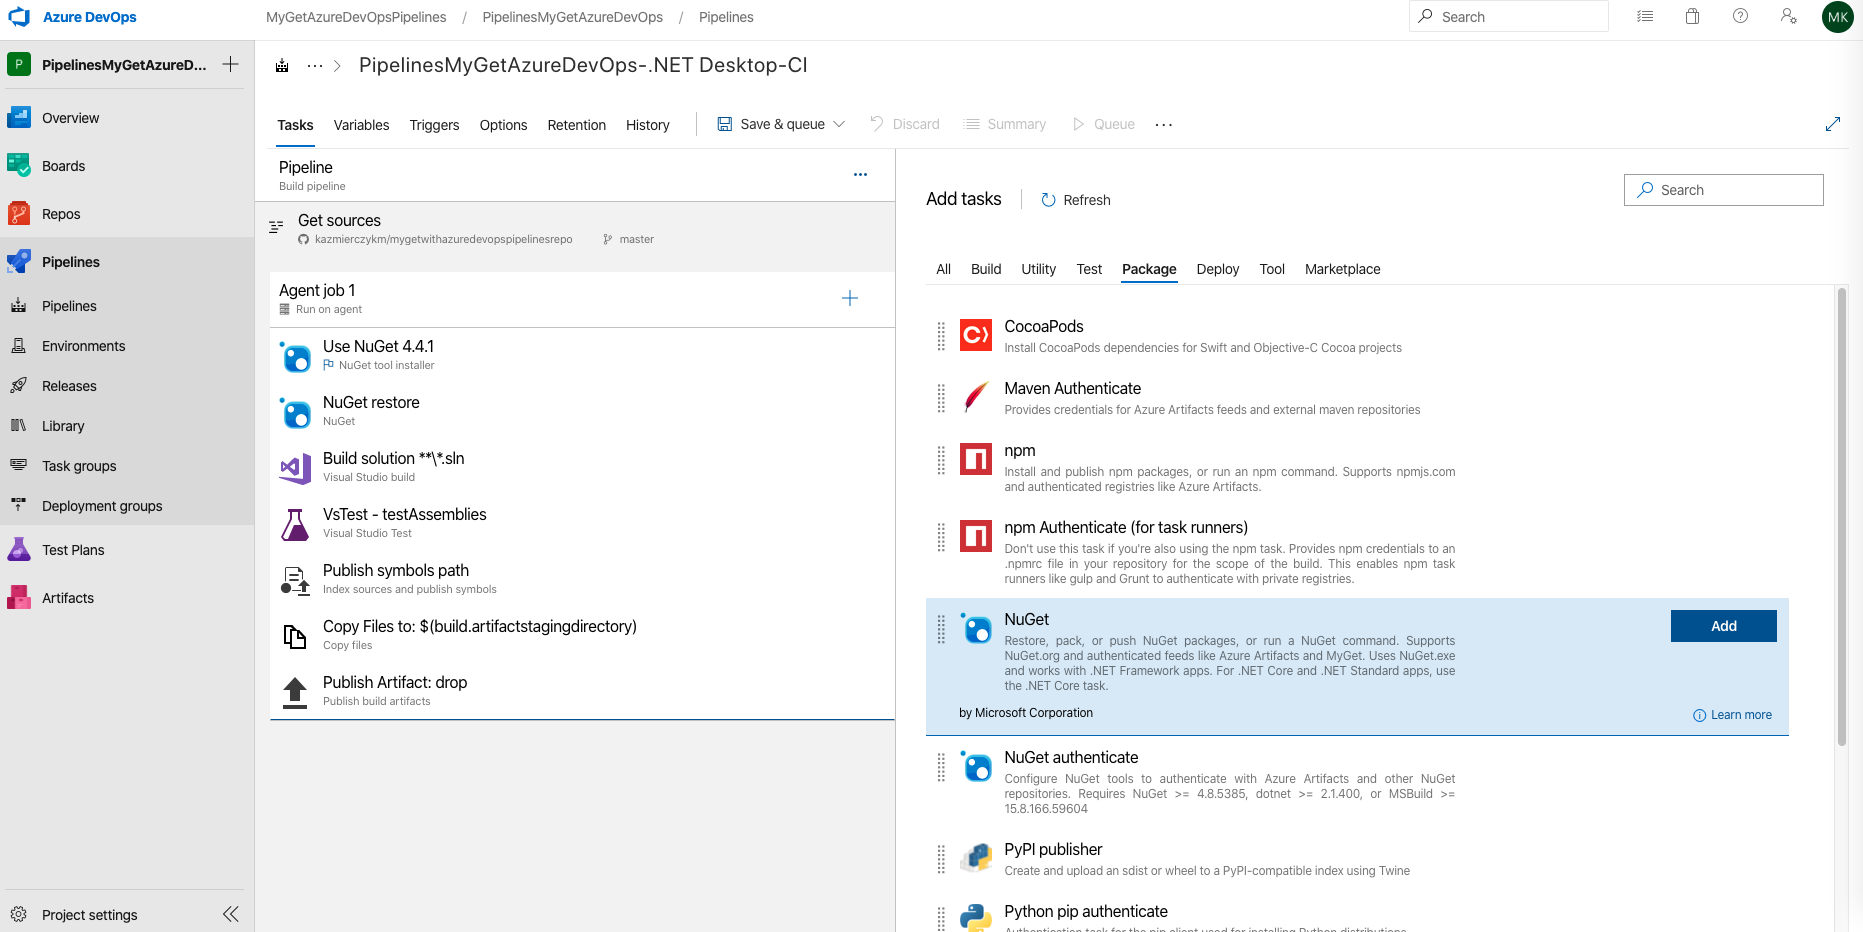
Step 6. Once you have identified your pipeline or created a new pipeline, add two NuGet tasks from the list of task options on the right.
Step 7. Select the first NuGet task you just added to your pipeline, and change the “Command” configuration from “restore” to “pack.”
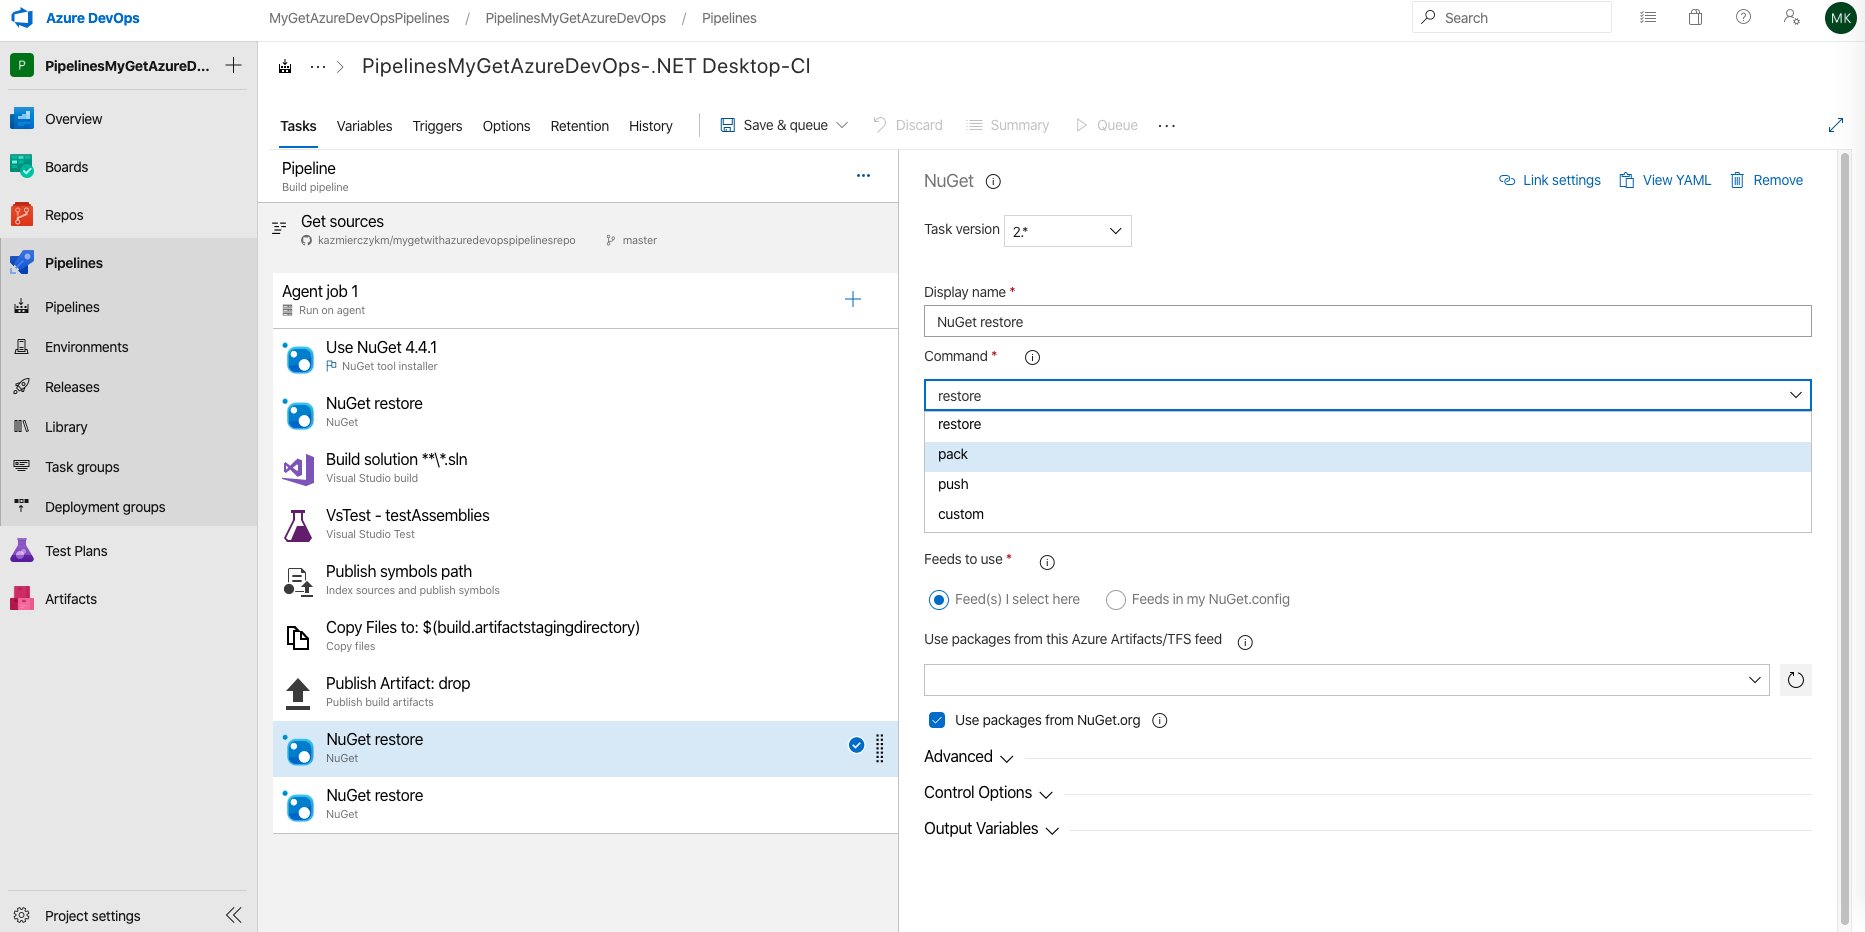
You can leave the fields to their default values, or change based on your specific project requirements.
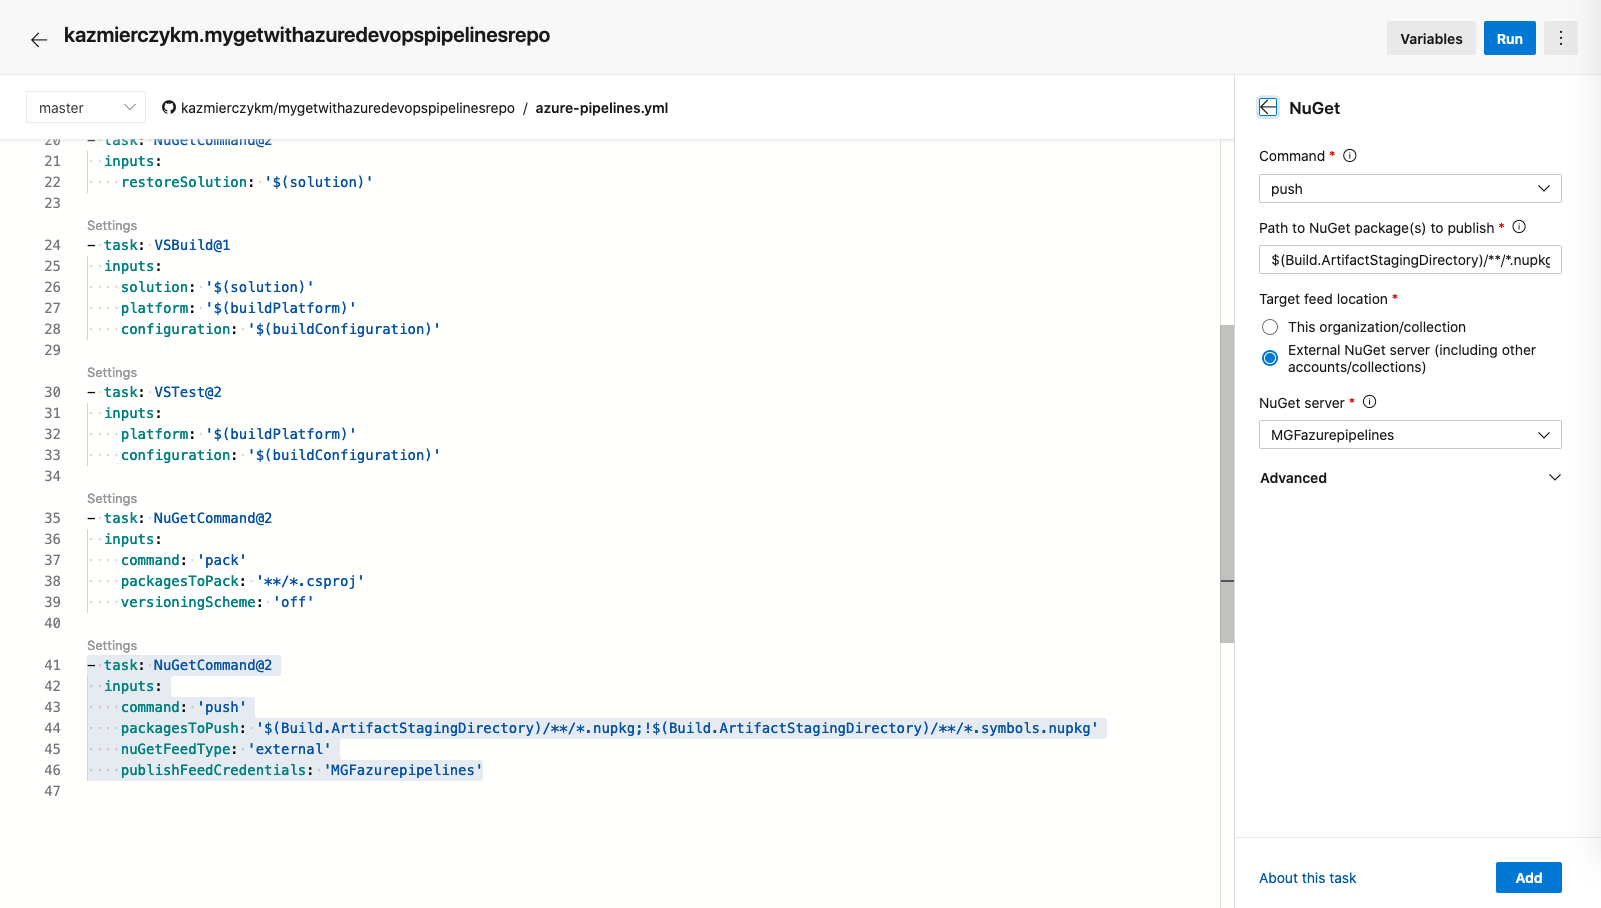
Step 8. For the second NuGet task, select “push” from the “Command” dropdown. Under Target Feed Location, select “External NuGet Server (including other accounts/collections).” To point to the MyGet service connection we set up previously, simply select the service connection you saved in step 4 from the “NuGet server” dropdown. This will automatically configure your build pipeline to push your NuGet build artifact to MyGet based on the feed details you entered previously.
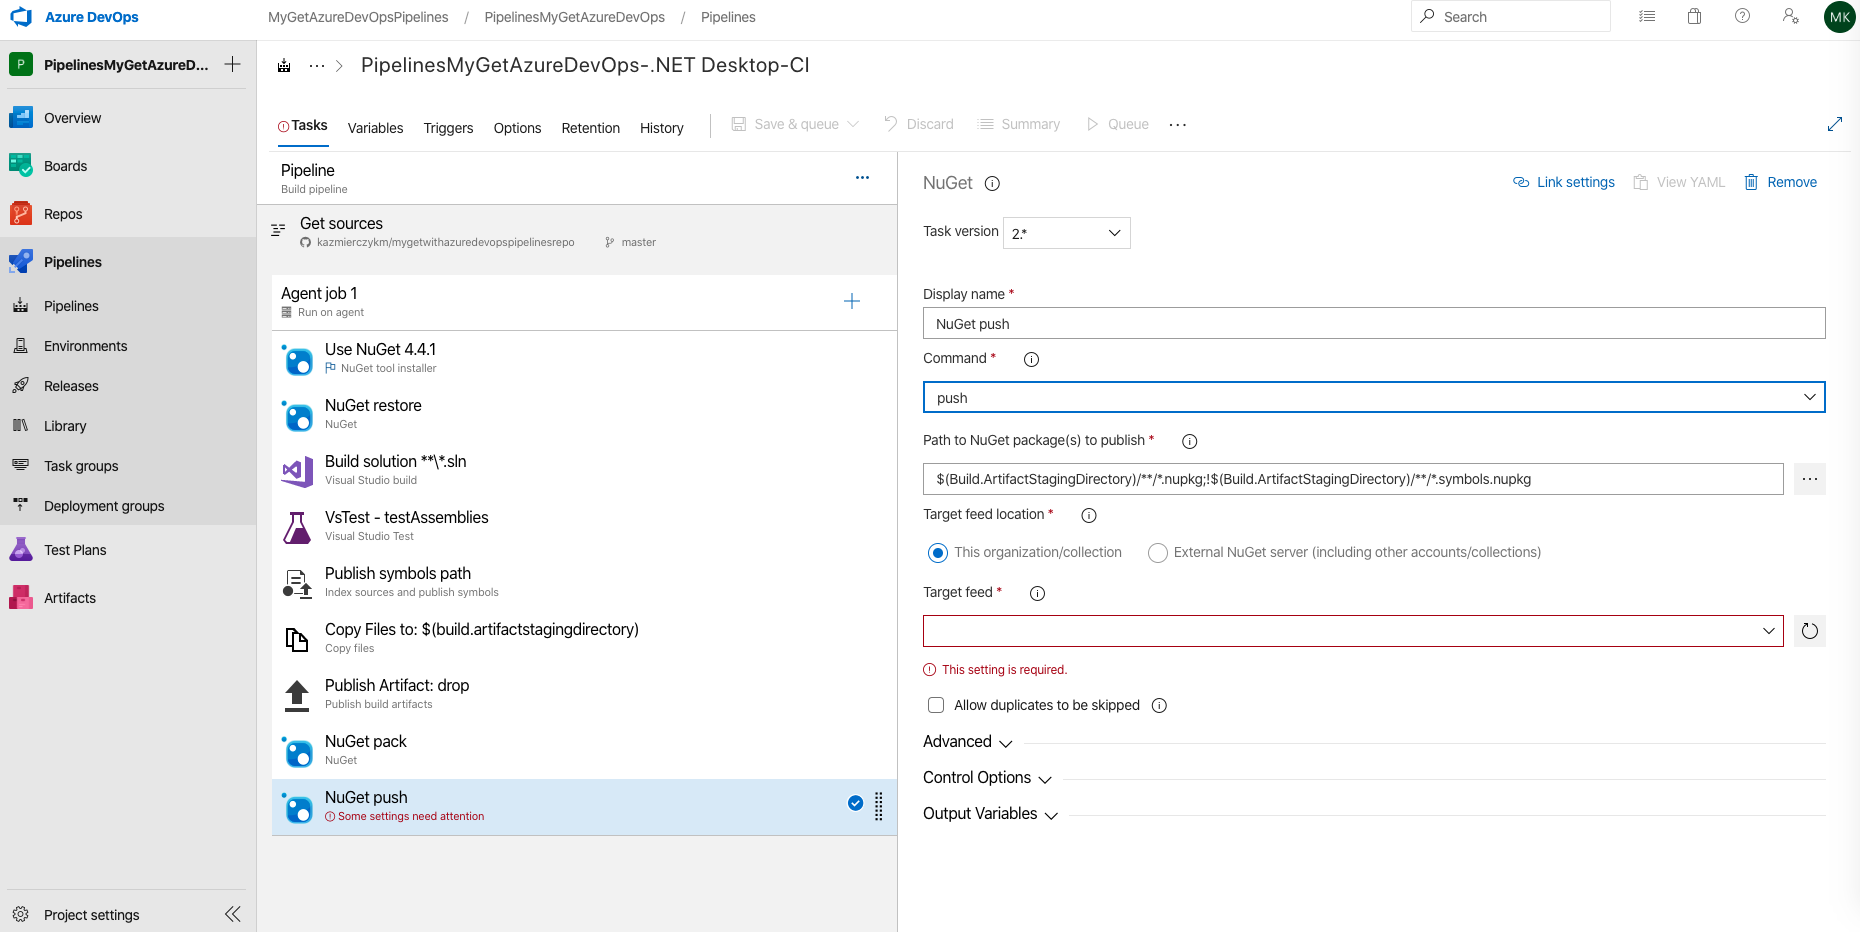
Step 9. Once you have updated the “Nuget push”, you are ready to run your pipeline! You can trigger your pipeline to run builds automatically based on the continuous integration settings you have previously configured, or manually trigger your pipeline to run.
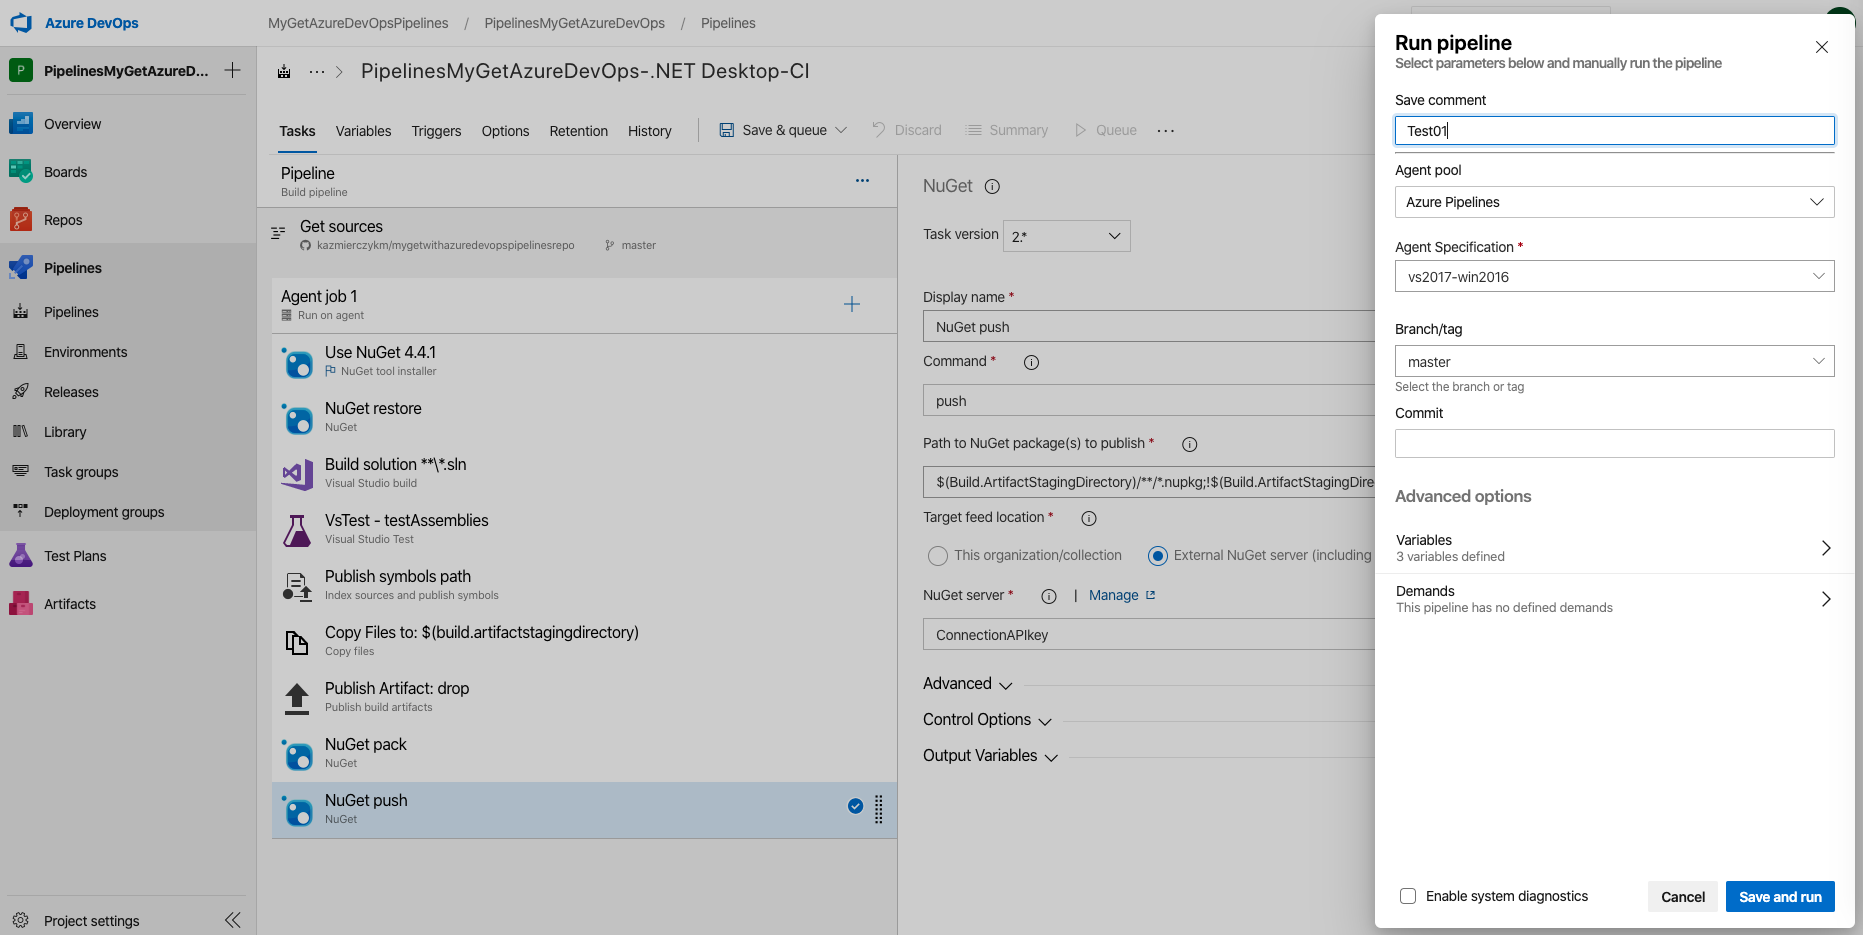
You can monitor the status of the build job from your Azure DevOps Pipelines section, and review the output logs from each task in the pipeline.
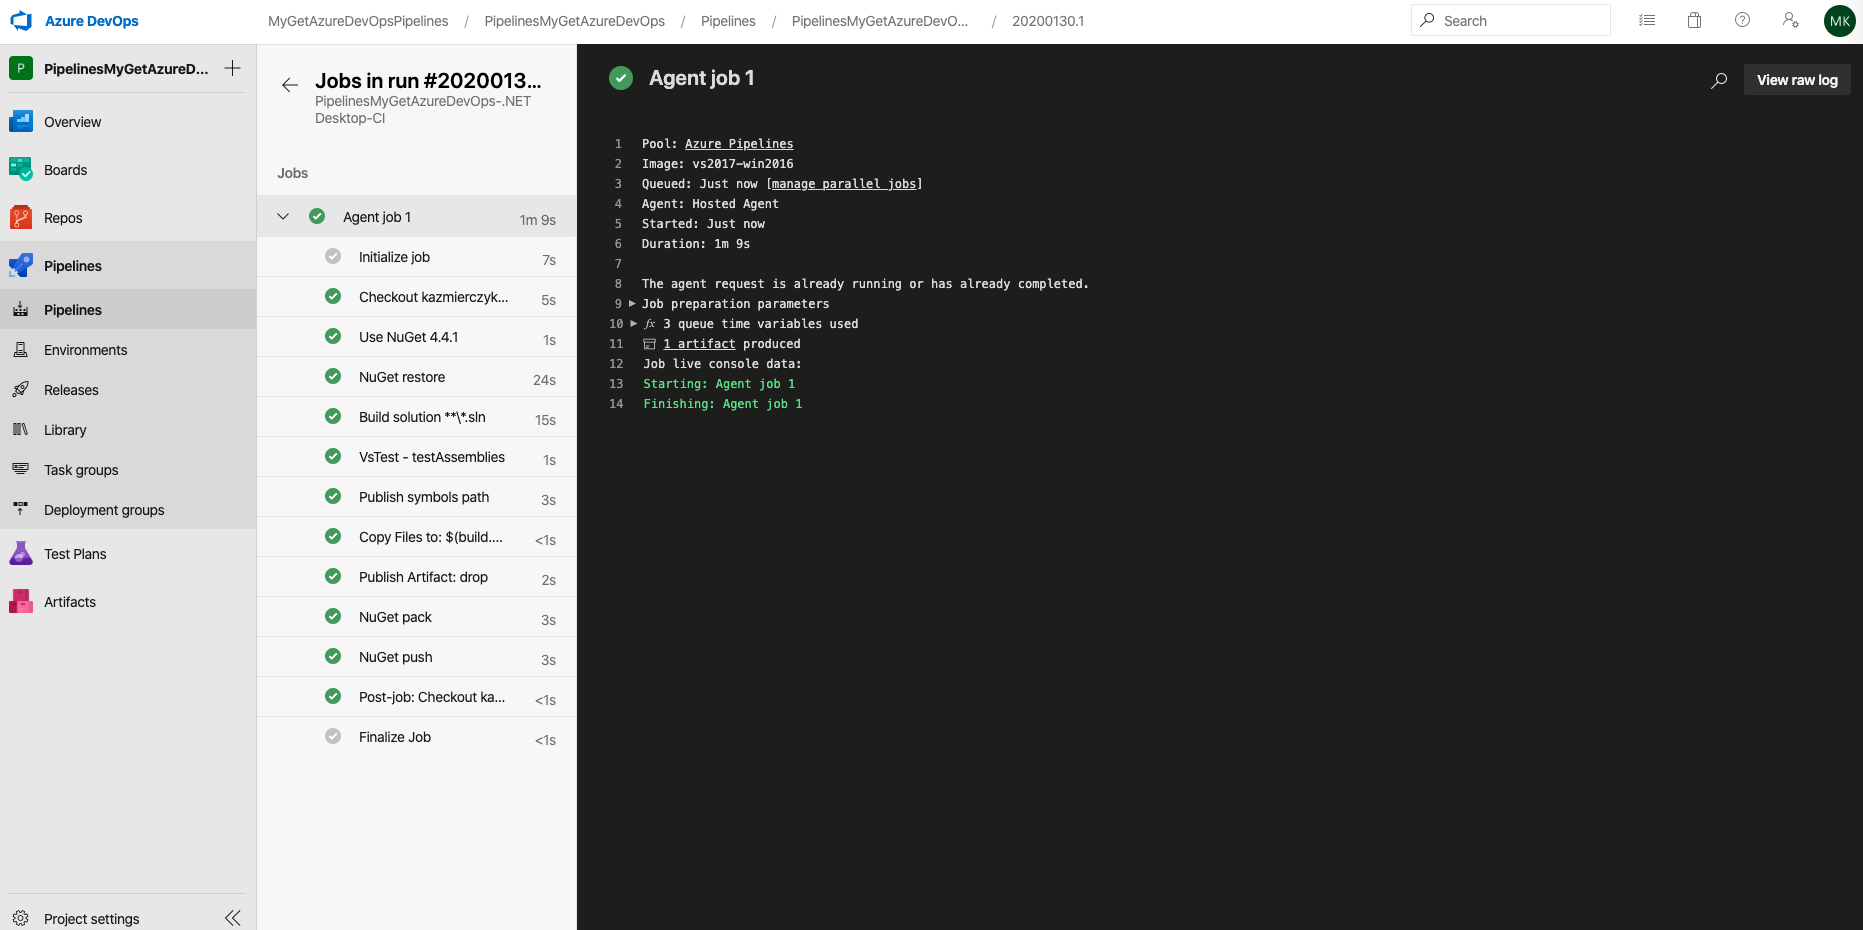
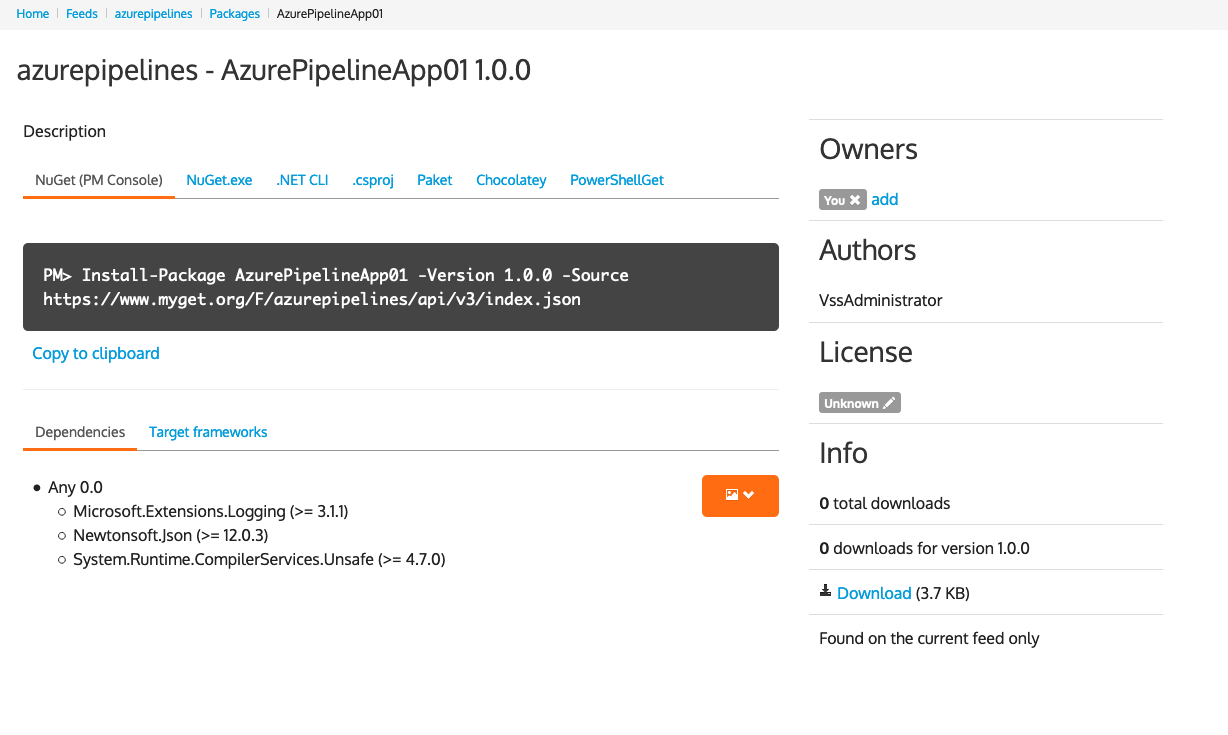
Step 10. Once you build has completed, you will be able to view the artifact it produced in your MyGet feed.
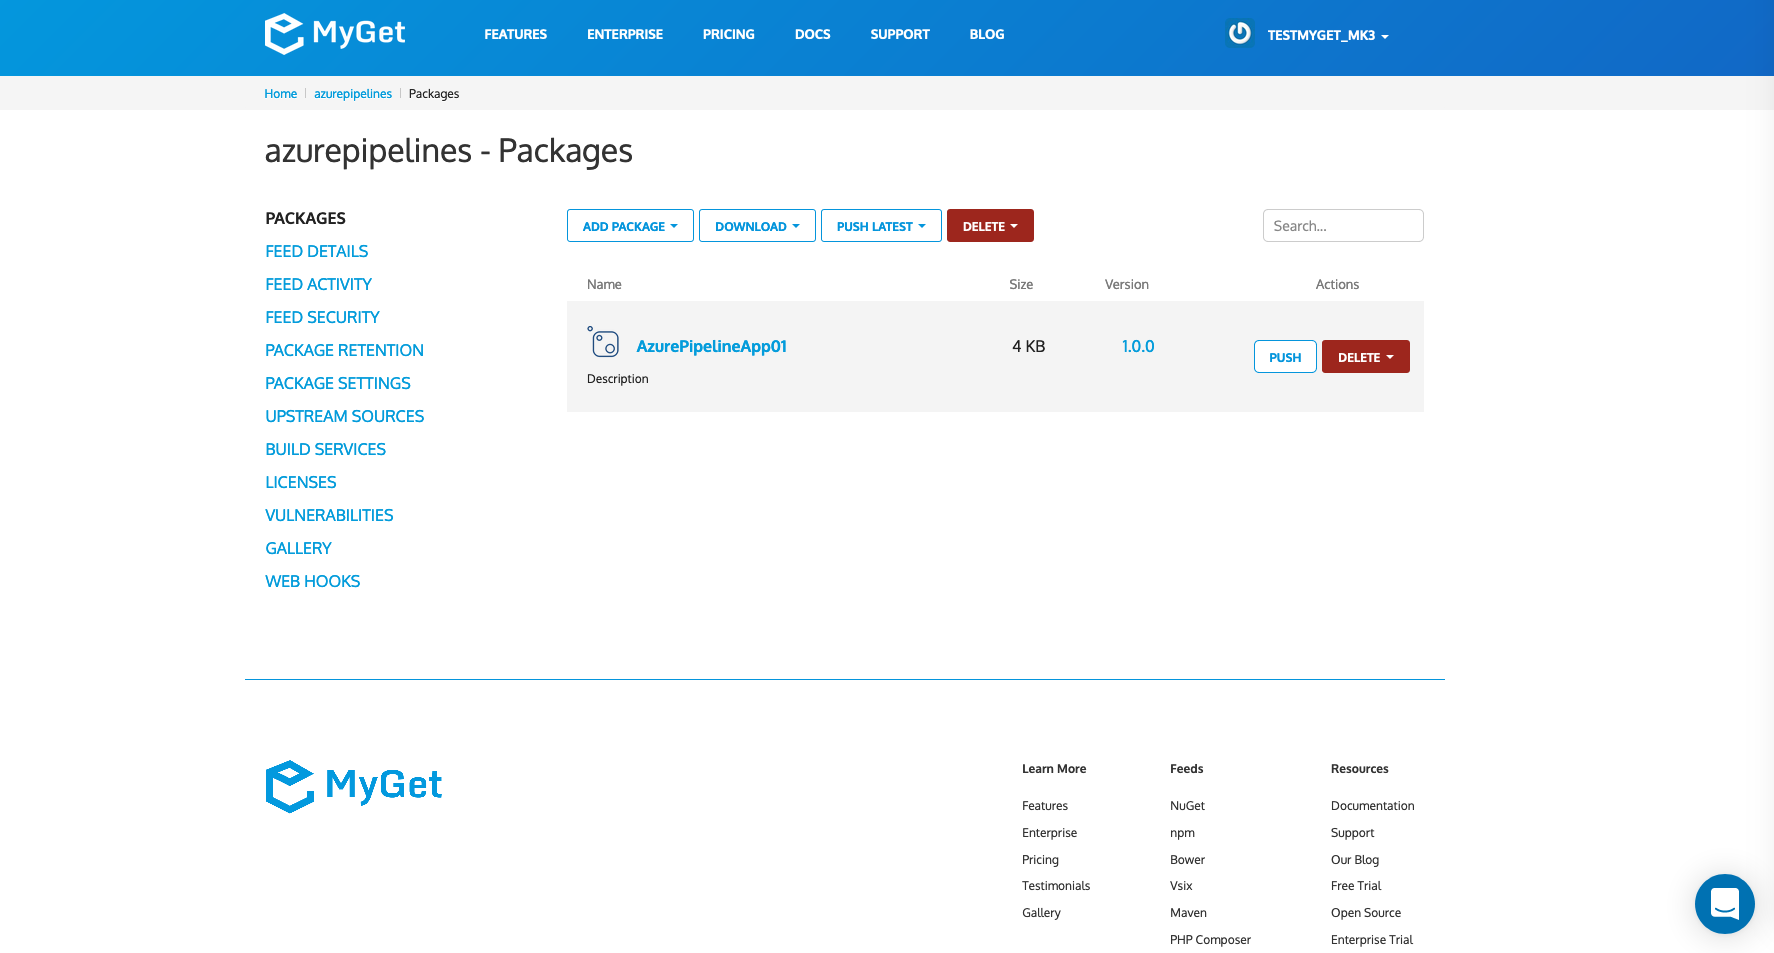
Click the package link to see detailed information about the package you just pushed to MyGet, including package owners/authors, license type, download statistics, dependencies, and snippets for downloading and installing the package from MyGet in multiple systems in your development environment (such as NuGet.exe, .csproj, Paket, Chocolatey, and PowerShellGet).
YAML Snippet
Alternatively, you can configure your Azure DevOps Pipelines to push your NuGet package to MyGet with a YAML configuration file. You can add your YAML file to the root of the source code repository for your project or add an empty one from your Azure DevOps Pipeline project. See below for an example YAML snippet configured to publish a .NET Desktop NuGet package to MyGet.
Note: you will need to set up a service connection to MyGet as seen in step 4 above before attempting to run your build. Replace `{MYGET_SERVICE_CONNECTION_NAME}` in the snippet below with the name of your MyGet service connection).
YAML Snippet
# .NET Desktop.
# Build and run tests for .NET Desktop or Windows classic desktop solutions.
# Restore, pack, or push NuGet packages, or run a NuGet command. Supports NuGet.org and authenticated feeds like Azure Artifacts and MyGet. Uses NuGet.exe and works with .NET Framework apps. For .NET Core and .NET Standard apps, use the .NET Core task.
# Add steps that publish symbols, save build artifacts, and more:
# https://docs.microsoft.com/azure/devops/pipelines/apps/windows/dot-net


trigger:
- master


pool:
  vmImage: 'windows-latest'


variables:
  solution: '**/*.sln'
  buildPlatform: 'Any CPU'
  buildConfiguration: 'Release'

steps:
- task: NuGetToolInstaller@1


- task: NuGetCommand@2
  inputs:
    restoreSolution: '$(solution)'


- task: VSBuild@1
  inputs:
    solution: '$(solution)'
    platform: '$(buildPlatform)'
    configuration: '$(buildConfiguration)'


- task: VSTest@2
  inputs:
    platform: '$(buildPlatform)'
    configuration: '$(buildConfiguration)'


- task: NuGetCommand@2
  inputs:
    command: 'pack'
    packagesToPack: '**/*.csproj'
    versioningScheme: 'off'


- task: NuGetCommand@2
  inputs:
    command: 'push'
    packagesToPush: '$(Build.ArtifactStagingDirectory)/**/*.nupkg;!$(Build.ArtifactStagingDirectory)/**/*.symbols.nupkg'
    nuGetFeedType: 'external'
    publishFeedCredentials: '{MYGET_SERVICE_CONNECTION_NAME}'
Read our contribution guidance or edit this page's source on GitHub.